There are many, MANY ways to breathe new life into an old piece of furniture. I’m talking real wood pieces here; not that cheap, single-lifespan particleboard crap. Older pieces have staying power and are repairable…Woodworkers used to build their furniture with better quality materials and meticulous joinery, which meant they lasted much longer. These methods also lend themselves well to re-finishing and re-creating pieces, or as the hipsters have now dubbed it, Upcycling.
I am really stoked that Upcycling has become such a massive trend which continues to juggernaut its way through social media platforms like Pinterest and Instagram. Also known as “creative reuse”, upcycling is “the process of transforming by-products, waste materials, useless and/or unwanted products into new materials or products of better quality or for better environmental value” (wickipedia).
Here are my 3 favorite Go-To methods for upcycling old furniture:
1: PAINT IT!
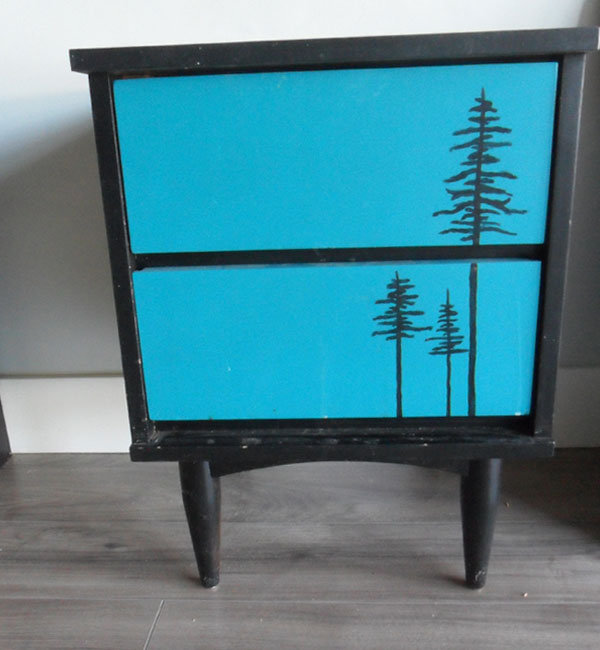
When you consider something like a piece of furniture to be more like a blank canvas, you really open up to the limitless possibilities of what it might be. For this piece, I found an old mid-century-modern style night stand on craigslist. For FREE. My favorite!! You can always spot a well made piece worth re-finishing by the way it was put together. Observe Exhibit #1 (dovetail joints). This one was a product of the paint I had available coupled with inspiration from the beautiful west coast forestry where I live. The result is a completely new (looking), one-of-a-kind furniture piece that is ready to be loved for another 50 years. Now that’s a trend I can get on board with.
There are many techniques to paint furniture. Solid colors, distressing, stencilling, special types of paint like crackle, just to name a few. Painting furniture is also a pretty easy way to DIY. Read here for a pretty good article on the whole process.
2-ALTER IT TO SUIT YOUR NEEDS!
It takes a keen eye to be able to look at a piece of furniture and see it for it’s potential rather than just at face value. The beauty of re-creating pieces of old furniture is that if you can envision the possibilities, there truly are no limitations of what you can make with a clever design and the right tools, and you can create the ultimate piece to function in your space.
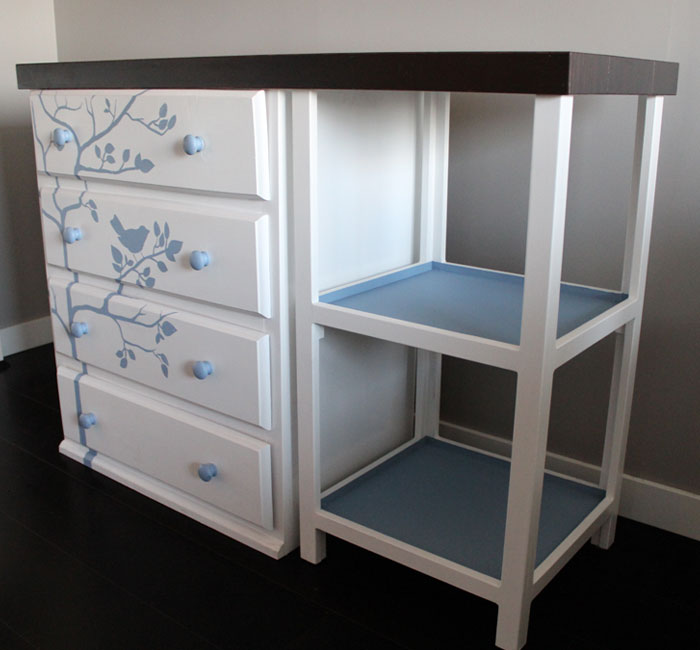
This was once an old, beat up pine dresser with sticky drawers and a tired facade. Expecting my first little guy at the time, I was putting together a nursery in our very small (Vancouver condo sized small) “den”. This meant multi-purpose pieces of furniture if there was a hope in hell of squeezing in all the necessities, like a change table and a dresser along with the crib. I found the dresser on Craigslist for $25 bucks and started with the design. I took some measurements of the space it would be living in to determine the size of what I was building, and a list of functions it would need to perform: dresser, change table, cloth diaper storage and shelving.
I basically just built a shelving unit the same height as the dresser and then used some leftover flooring from our condo (the builders had left a huge pile of it in the bike storage locker) to make a new top. You could also have a piece of butcher block cut to the right size to make an awesome new top which would last forever, or you could get a piece of plywood cut to the proper size and apply some trim moulding.
3: RE-FINISH IT!
When you hear the term “finish” (or re-finish, which basically means to re-do the finish) in regards to a piece of furniture, what is being referred to is the protective coating on the wood. There are a wide variety of different finishes available, with varying levels of sheen and protection, some with built in stain, some designed to go over top of a stain. The “stain” is basically a dye for wood, and as with finishes, there are a wide variety of them available. See this article describing the different types of finishes available.
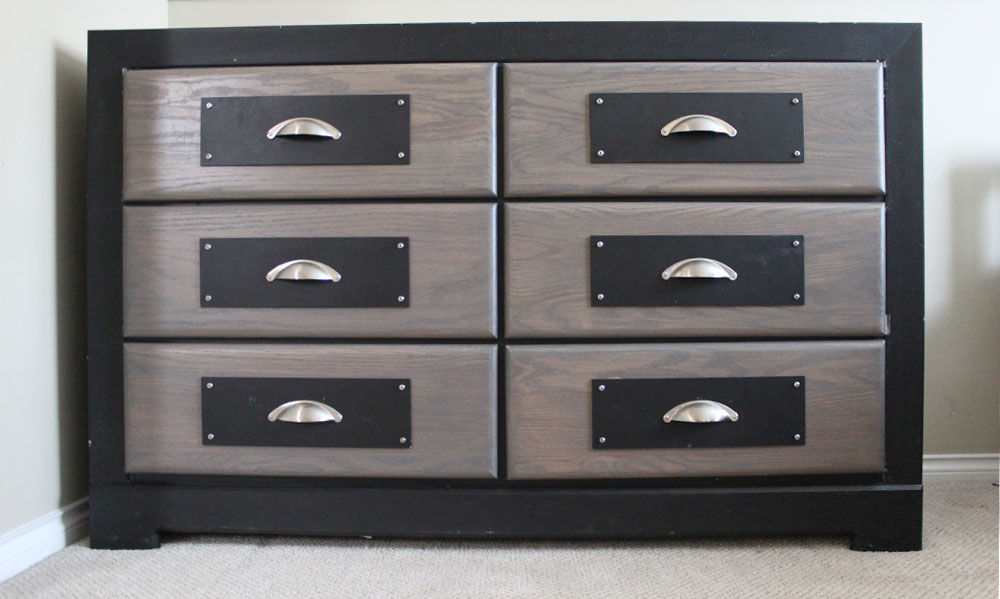
Re-finishing is best suited for furniture that is in reasonable condition and you would either like to make it look new or change the color. This dresser was an awful shade of pastel pink, straight from the 80’s. The drawer fronts were made of solid oak, the rest of the dresser was a wood veneer. As I mention in my blog post “How to Repair Particlebaord”, veneer is a thin layer of wood pressed onto another, less expensive material such as plywood or MDF. It can be tricky to re-finish, because if you sand through the veneer in your prep work, you’re basically left with something that can’t be re-finished. (Ok, you could re-veneer the surface, but for the price and effort involved, not to mention level of expertise required, I wouldn’t recommend it).
I chose to re-finish the pieces which were made from solid wood, paint the parts that were veneer and add a clever design detail on the fronts to give it an industrial-chic sort of feel. The detail serves double duty and also acts to cover the existing hardware holes so I could replace the original drawer pulls with anything I wanted to.
There really aren’t any rules when it comes to designing your upcycled furniture projects, and anything you find that you think would look neat as part of your project certainly can become an element of design 🙂
Did you Like What you Read?
Sign up for our Newsletter and get Tools, Tricks & Tips to Educate & Inspire you straight to your Inbox!!


